So I’ve been crocheting for more than three years now….I’ve made endless blankets, toys, coasters, socks, baskets….you name it! But for some reason I’ve never made a crochet cushion. The other day I looked at our sofa and thought it was in need of a bit of a facelift, and inspired by @sweet_sharna on Instagram (who has the BEST collection of crochet cushions I’ve seen – if you’re not already following her you should be!) I decided to get cracking. Maybe it’s because of all the grey cloudy weather, and my impatience for summer, that I knew this had to be a happy, bright, colourful cushion.
I love using cotton – it’s durable and gives great stitch definition, so I opted for Rico Creative Cotton. The colours are fantastic and it’s Aran weight which I think is perfect for this cushion. Here’s a list of what you will need if you want to have a go at making this cushion:
– Rico Creative Cotton (50g balls) in the following shades:
White (x2), Turquoise, Light Green, Candy Pink, Light Yellow and Cherry.
– 4x buttons (I used 20mm sized ones from John Lewis)
– a 3.5mm crochet hook (I used a Clover Amour)
– cushion pad – this cover fits a 45cm x 35cm size cushion
– a wool needle for sewing in your ends
– a needle and thread for sewing on your buttons
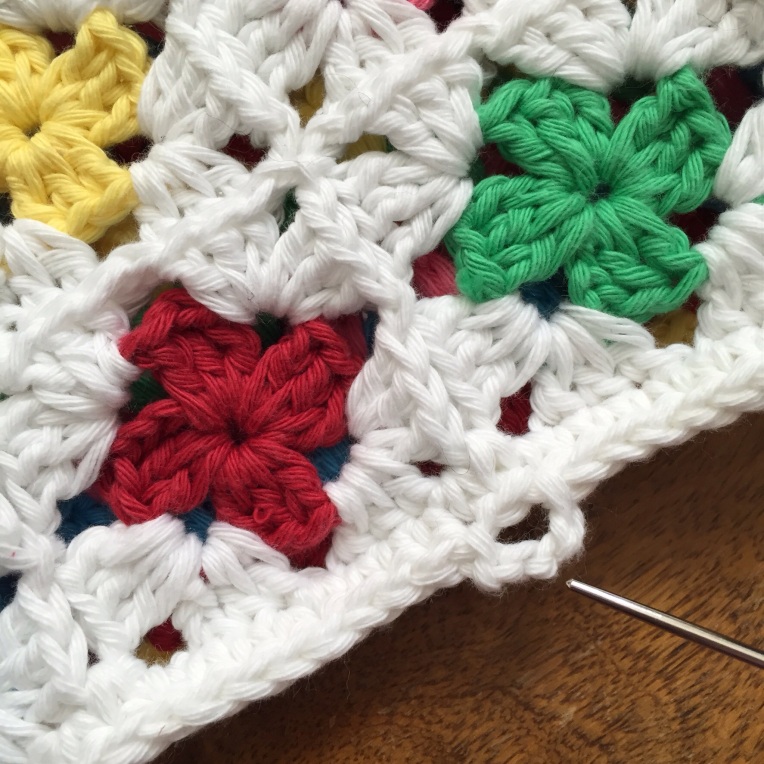
One side of my cushion is made up of mini granny squares in the 5 colours (not white). These are so quick and easy to make as you’re only making one round. If you’re not familiar with how to make these here’s a brief explanation.
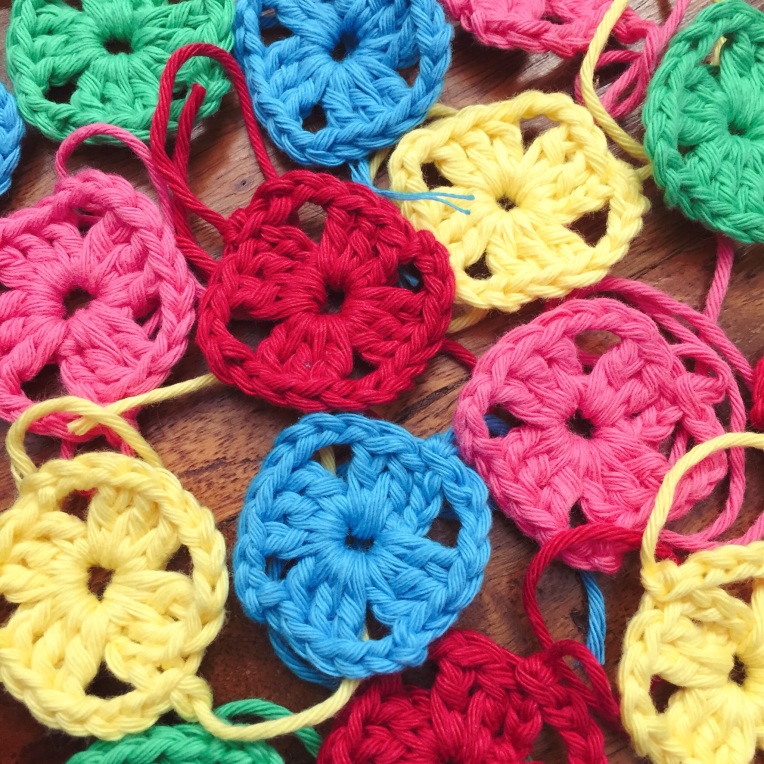
Ch 5, and slip stitch into first chain stitch to join which makes your foundation ring.
Ch 3, then do two treble crochet stitches (UK terms) into the middle of the ring. *Ch3, then 3tc into the ring* Repeat between ‘*’ twice more – this will give you four ‘clusters’ which will be the sides of your square. Then Ch3 and slip stitch join to the 3rd chain of your first cluster (the Ch3 youmade after your foundation ring).
Cut a tail, and pull it through the last loop on your hook to fasten off.
You will need 56 of these mini squares (it will be 8 wide and 7 down) so make 11 of each and 1 extra in any colour (I had an extra green one).
The second round of the squares is done in white and is also how the squares are joined, using the Join As You Go method – if you’ve not done this before it’s worth learning as it saves a lot of time, Attic 24 has a great tutorial here. Here’s a picture of the layout I used – I didn’t want any colours too close together so there is an order to it but without it looking too planned (I hope!)
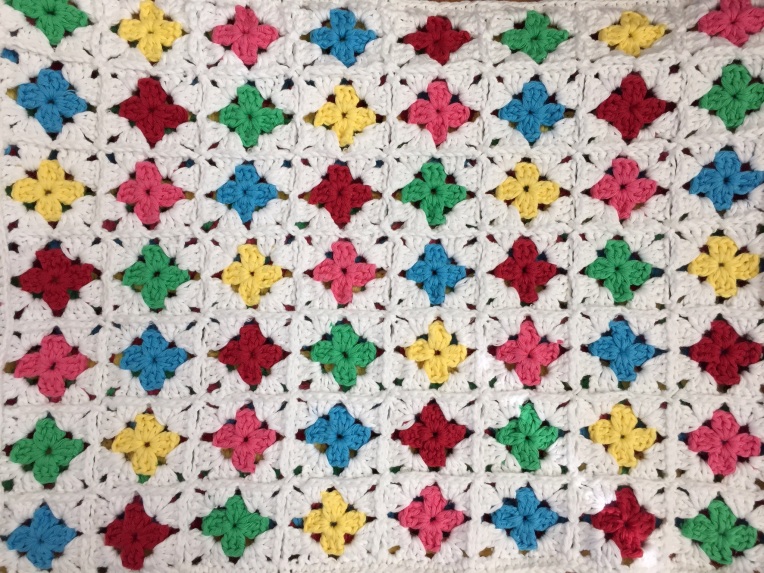
It’s worth checking at this point that it’s looking the right size for your cushion pad. On a 3.5mm hook my squares were 5cm square once the white round was added. If yours are slightly smaller you could always add a border of double crochet (or two rows if it needs it) to get to the required size. If you place it on top of your cushion it should just reach the seams on the sides.
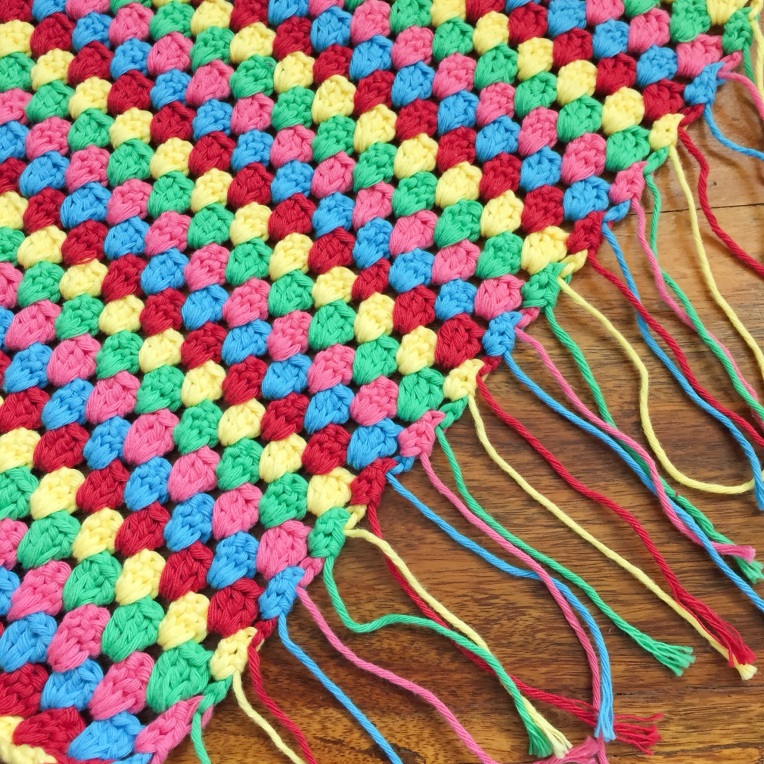
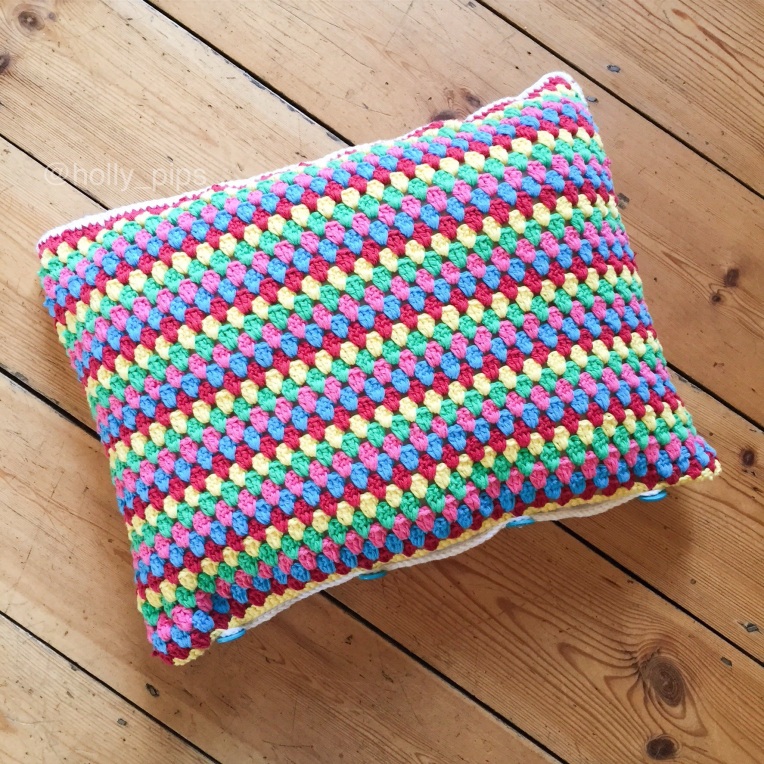
The back of my cushion I decided to do in Granny Stripes. There was a few reasons for this…I was a little bored of making granny squares by now….I’d used up all my white yarn joining the squares together, but had loads of the coloured cotton left…and why not have a different pattern on the other side?! it makes it reversible and you get two different looks!
My chain for my stripes was 84ch +2 (in all honesty if I did it again I’d make it 81+2 or maybe even 78 +2 as my back was a teeny bit bigger than the front). Again if you need a good tutorial for granny stripes Attic 24 is fantastic (can you tell I’m a fan!?) – here’s a link to her version. If you’ve been doing them for ages just crack on! Here’s the colour order for my stripes…
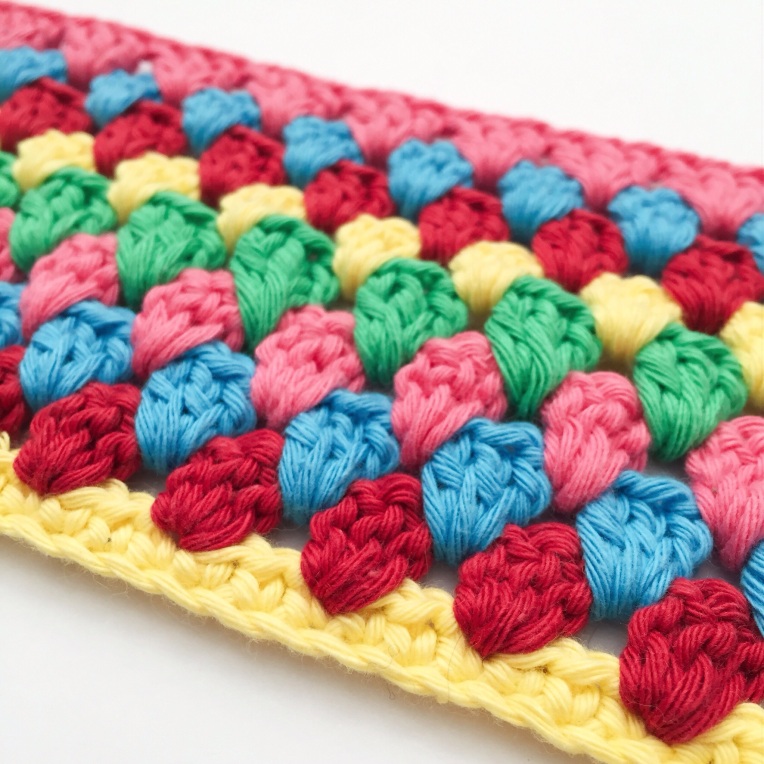
My cushion back was 31 rows (not inc the chain and DC first row). But check the size as you go along and compare it to the size of your cushion front made of granny squares.
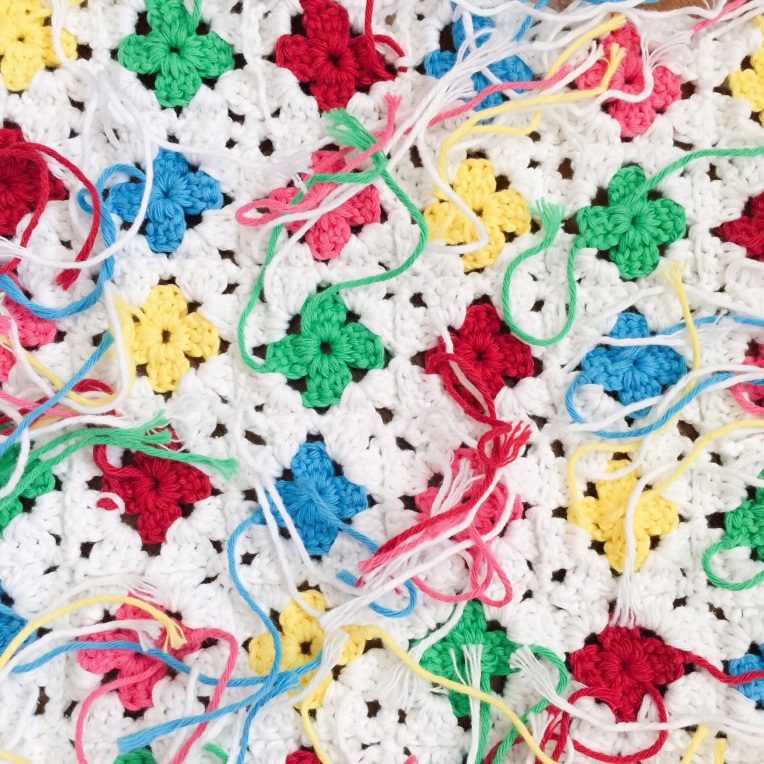
Then of course you have the fun of sewing in the ends….all those ends……
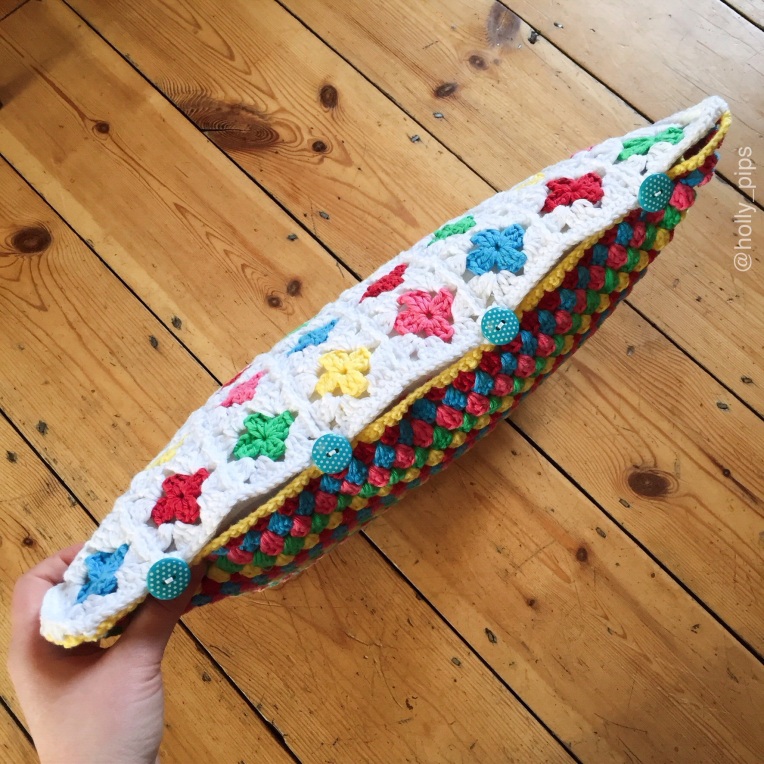
Once all the ends are sewn in we can then join the cushion parts together. You’ll need to join them on three sides – if you’re looking at the cushion the right way up, we’ll join the right hand side, then the top, then the left hand side.
I used some leftover white cotton from another project but you could use one of the colours -there should be enough left. Positioning the cushion parts wrong sides together, and starting at the bottom right hand side of the cushion, double crochet the two pieces together. You need to crochet under the two loops of the front and two loops of the back part of the cushion. This is easy for the top of the cushion where the stitches will line up easily. For the sides it can be trickier as the you’ll be working into the sides of the granny stripes. Just keep the pieces lined up and space the stitches out evenly using the front of the cushion stitches as a guide.
Once the three sides are joined, move on to the 4th side – the bottom of the cushion. Work a row of dc across the front side of the cushion only – this will strengthen the edge of the front of the cushion. When you get to the end turn your work. I didn’t need to add any more to the size of my cushion so I slipped stitched my way back along to make buttonholes. I spaced them one square in from each end and then 2 squares in again on each side, making 4 in total. To make the button holes, I chained 4 and missed 3 stitches along then joined it back on and kept slip stitching along. Here’s a close up which hopefully helps show how they look.
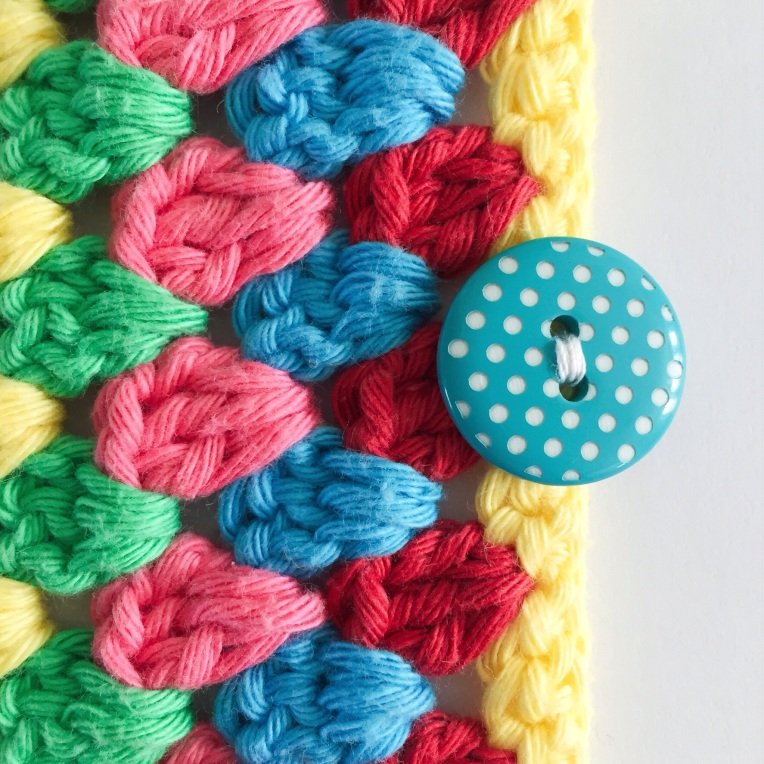
Once done, sew in your ends. Then position your buttons to line them up with your buttoholes – you’ll sew them to the edge of your cushion back. Like this…
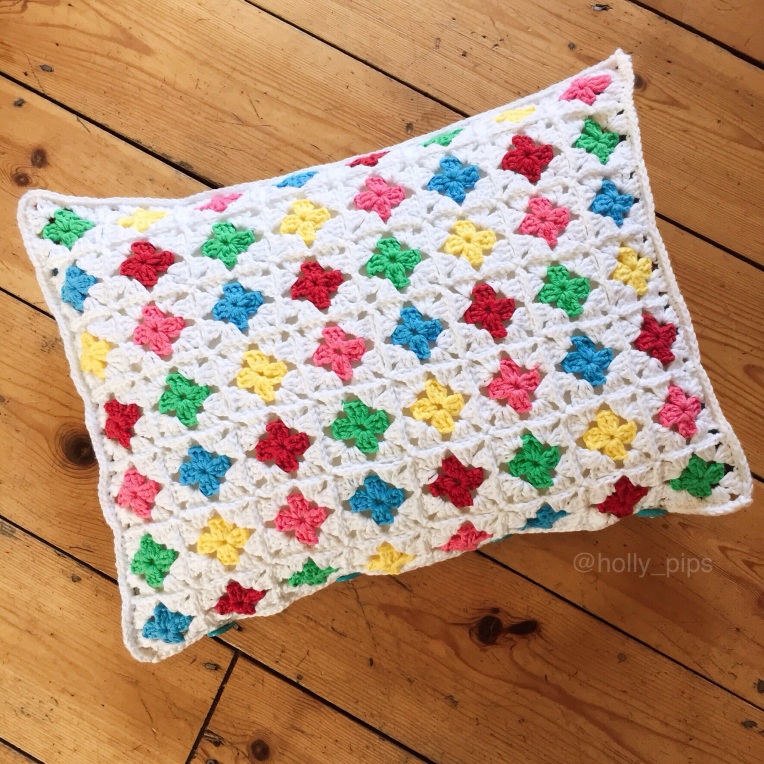
And voila! One completed reversible crochet cushion!
This is the first tutorial I’ve written on here so I hope you’ve found it useful/interesting! If there’s anything I’ve missed out or if you have any questions please do leave me a comment and I’ll try and answer as best as I can 🙂
xx

you just gave me a great idea! If you’re making a square cushion cover, you can rotate the back 90° and then you can space the stitches evenly where it’s more difficult on the sides. I hope you can understand this, I can see it in my head, not sure I can explain it! 😃 thanks for the inspiration!!
LikeLike